The Vault Regulars

Monday, October 8, 2012

A bit of deja view!

 Last weekend we took Dorothy up onto Marsden Moor and i cut short the planned  route because i thought it might be a bit much for her. Anyway, during the week she said she enjoyed being up there and would like to do some more. So strike while the iron is hot, as the saying goes.

 Sunday's forecast was decent so it was a bit of a surprise when we looked out first thing to see basically nothing. The fog was thick, i could only just make out the car across the road.
 There was some dissenting from the ranks but with a little persuasion we left home. I basically said that if we get to the car park and it's still really bad we will go and do something else.

 Upon arrival at the car park (SE 01762 09471), it was still quite thick with fog but the sun although weak, was starting to have an effect on burning it off. I had a walk around and made the decision that we would set off.

 4.5 degreesC was the temperature but it felt warmer than that. The dew on the high grass and on the many cobwebs covering the heather were sparkling and looked jewel like. The silence was deafening, quite earily in fact.
Our Route. 10.3km
 The map shows a footpath following the boundary line between the A62 road and Black Moss reservoir. I looked for a stile but didn't see one. Then i noticed a fence post that could be removed to allow access for the farmers quad bike. We went through and replaced the post.

Within 100yds we turned back. It was a quagmire. Approaching the fence a dark shadow seemed to drift past in the mist. It was a lady and her dog. Again carefully replacing the fence post we set off along the Standedge trail until the Pennine Way path comes in from the right. The PW trail here is well made and progress easy considering the moorland on either side.

Then in amazement the mist cleared as fast as switching on a light. Increadably, everything around, the moorland, the hills, the farms along with people became clear. Stunningly clear.

The grass was high along the track and it didn't take long to feel the effect of the dew through the trousers. But it was warm enough not to worry.

Passing Black Moss reservoir along the west bank rather than the usual east side the views down in to Diggle via Broadhead Brow showed that the mist was still in residence lower down although it wasn't a complete temperature inversion.
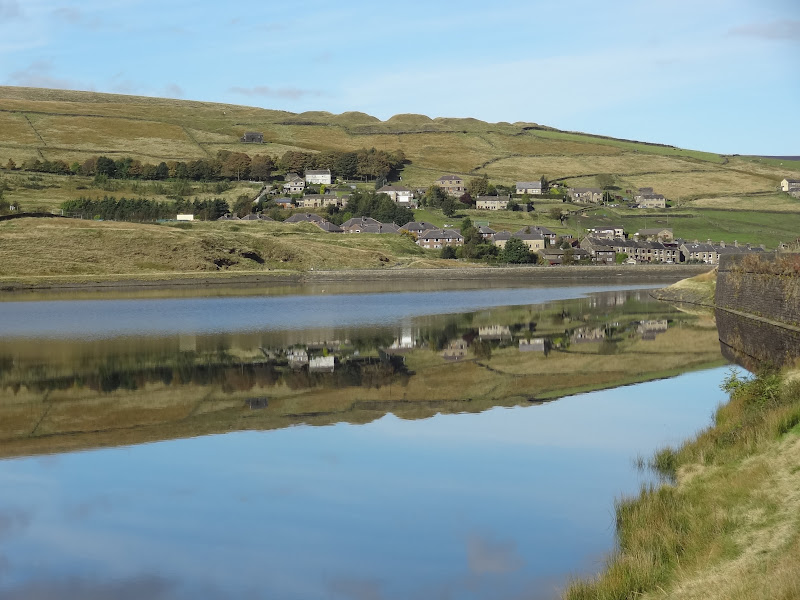
Black Moss reservoir

Diggle in the mist

This was my second mistake with the route. We should have gone on the east side because the path shown south of the reservoir is almost non existent and Dorothy again was soon knee deep in the smelly stuff. Fortunately she said "oh well, now that i'm in it nothing else will matter." It was a bad path and i was glad to get back on the flagged track of the PW.

 A person approached from the opposite direction, had a pleasant few words about the beautiful day and then carried on. Halfway down Blakeley Clough we met a chap on his way up. He was sweating badly and grumbled about how bad the morning was when he set off. He had  4 layers on. He had no rucksack and so kept the layers on. It was getting really warm now. One of the nicest days of the year.
 We had a bit of a laugh at Dorothy's attempt to cross the clough without falling in, which she did eventually but it wasn't as funny as when she glissaded, a bit further down. She wasn't hurt but it took a while to get back up on her feet. Mainly due to laughing.

 The views of Blakeley Reservoir and the Wessenden reservoirs are wonderful from the clough track just before dropping down to the valley floor. There is a short steep section of path to ascend from the valley to the reservoir land rover track.
Wessenden Res'r

The route onwards to Blakeley Reservoir

A couple waited at the top of the path for us to get up and insisted we have our photo's taken with the Pennine Way sign as backdrop. Maybe they thought we were doing the whole route. Ha.
PW sign on Kirklees Way track

The walk down passed Blakeley and Butterley reservoirs is nothing more than a joy. Today was almost cloudless with just the odd wisp of white. No breeze to speak off resulted in mirror images on the water. A few more people passed us, all now wearing light clothing.
Blakeley and Butterley res'rs

Pump house


Butterley Reservoir and Netherley

We took the opportunity of a bench to have a coffee and a bite to eat.
We passed a very nice sculpture called Still Life. It's by Joss Smith and is tropical fruits. It is a waypoint too with arrows showing directions of the Kirklees Way. It was erected in 1993.

I wondered at this point if i was about to make another path error. The map shows a route leaving the Kirklees Way and passing over the weir and through Netherley. No path is shown crossing the dam of Butterley Reservoir. But the path across looked good and would save us a bit of descent and ascent. Fortunately as it happened we got onto Mount Rd with no problems. Phew.
Passing the very busy Golf Course we soon came to the marker post pointing our route back across the moor to Warcock Hill.
In too soon a time we passed the point where we initially joined the PW on our outward route. Many people were about now and some large groups too. But what stunning moorland scenery.


As we were going to pass close to the Great Western Pub and as we had never been in before, we just had to call in to do a quality control check.

Lovely place. Spotlessly clean and tidy, Black Sheep Bitter on draught and impeccably kept. Great place for a Sunday Lunch. We will keep this on the radar for the  future
We had done 10.3k at a very leisurely pace and had a wonderful rare day.

Some more pics can be found here


Saturday, October 6, 2012

A nice walk home.


 A bright sun shinning through the curtains was our first glimpse of the day. Is it raining i asked Sheila who was already downstairs and making some tea. No it’s a lovely morning was the reply and so it was up and out quite quickly after that.
Giving Dorothy a shout and post breakfast we set off.
Initially we set off south along the Rochdale canal until approaching Chadderton where we left the canal to enjoy a good path following the River Irk.

We have seen plenty of rain this last week and it was a bit of a surprise to see the amount of flood water. In the photo below the water on the left is usually a field full of sheep.
Today it looked like a new river. Complete with swans, Canada geese and Mallard a plenty.

Just before leaving the canal, 2 horses gave me the chance of being a bit arty.


The river Irk passes through Chadderton Park, a place usually full of dog walkers and today was no exception.
On the other side of the park we pass through the outskirts of suburbia. Although it’s a quiet village Chadderton Fold today had a juniors football team in residence. We moved quickly past and into Healds Green. Just prior to being back in open country there is a bit of a hill that Dorothy really loves.

We usually shout some remark back like “come on, almost there” and we usually get a remark back too but it’s not printable here.
The narrow land rover tracks today were flooded although the views of moorland along the Pennines looked so close.
Sheila doing some Irish dancing.

View across towards Grains Bar. (Centre)

Yours truly. Just as we enter Tandle country park with it’s beautiful Beech Trees. The leaves just turning to Autumn and resplendent in the low sun.


 I love walking in this park. Every day is different because of the light filtering through the foliage. The ground becomes covered in copper coloured leaves. Squirrels abound here too.
Here are a few pictures of the trees.


On the high point of the park is the trig point and a monument to the dead of Royton.
The views from the top are always worth the effort of getting there.
View across to Derbyshire

View of the Manchester skyline.


Winter Hill (L). Pendle Hill (R).

Wind farm on Scout Moor. Not turning today.


The route home after a good 10k walk.

Wednesday, October 3, 2012

Lightweight remote cylinder stove.

 My favourite stove for all seasons is the Primus Express Spider remote cylinder stove and it is very good, especially when ambient temperatures are low. 
 The leg design could have been better and i improved mine to stop the stove tipping. I did a small post on it here. CLICK   
 Remote cylinder stoves are not the lightest backpacking stoves you will find but the low centre of gravity is what i particularly like.


 I have numerous stoves, Coleman F1, Optimus Crux, White box, BPL pocket Ti, Trangia and more Meths burners than i can shake a stick at. But stoves fascinate me and i am always trying different designs usually of my own, to try and get something more efficient, lighter, smaller, quicker. It doesn't always work and i end up back at the drawing board but it's fun trying my ideas.
 The PES (Primus express spider)weighs 200 grams and folds down quite neatly into my 600ml pan. Good for a remote cylinder stove of such robust design and quality. The only down side to using this stove is that the windsheild required has to be quite a large diameter and quite a large height.


 I have been considering trying to get some weight out of kit. After many sketches and hours making cardboard prototype designs, i decided not to compromise the stove and end up destroying it. But to have a go at making my own from scratch.
 That's where i ran into problems. I searched and searched to see if i could buy the parts as individual items and modify them. Burners, nozzles, gas pipes, regulators etc etc and i just couldn't find anything anywhere in the very light weight department.
 I was going to give up when i thought about looking for a cheap off the shelf remote cylinder stove, stripping it down completely and revamping the design. Not the way i wanted to go particularly but at least i could try and achieve a lighter stove and if i ended up ruining the thing, well i would have had fun trying anyway.
 Checking out the web i eventually decided to go for the Hi Gear Inferno folding stove although there were a few choices. It was just under £20 and weighed 250gr. I recon that if i had managed to source the parts individually they probably would have cost me at least this amount of money. So it wasn't a bad idea to buy off the shelf after all. As long as it would strip down of course. Some stoves don't readily do that.
 Luckily this stove came apart completely into it's component parts. The parts i had to keep were the burner head, the remote gas tube and regulator. Everything else could be changed, modified or binned.


         Here's the stove as bought.

The Hi Gear Inferno stove.
A decent buy in it's own right
250 grams.

 I was lucky, this stove stripped down completely which gave me many options of design, having more or less a blank canvas to work with.
 So i started off by throwing away the piezo ignition. From past experience these are very unreliable and have a short life span.
 The leg assembly pan support was very well designed and very well made but it was also the heaviest component, so that had to go as well. I looked into making the assembly lighter but not enough weight could be got out of it.
 The standpipe and hose support, i decided to keep because although i could make lighter versions, it would take time and the resultant weight saving wouldn't justify all the effort.
 So, with the bits left, i tried numerous ways of supporting the burner, supporting a pan whilst maintaining stove stability. On numerous occasions i thought i had it cracked only to be disappointed when i got to use it in the field. (Well in the garden actually).
 Like all prototype designs you have to tinker with it before you end up with the production version, so i wasn't disappointed that i had a few failed goes.
 One of the things i did learn was that you cannot support pans using aluminium tent pegs. Heat changes the molecular structure of the metal in such a way that with only a few uses and with the peg glowing red they start to break up. Result, spilt pan of water.
 I decided to purchase some 2mm stainless steel rod from ebay which didn't cost much and it gave me a chance to play around with pan support design.
 Titanium is out of the question by the way, it's just to expensive here in the UK to play around with.

 So this is what i ended up with.

 As a support for the burner standpipe i bought an aluminium water bottle for £1 and cut off the base. I drilled numerous holes which would allow air to completely flow around the burner when a heat shield was being used and also to reduce the weight of the base.
 I used the 2mm stainless rods as pan supports and angled the ends to allow my 600mm Ti pot to sit firmly in place.
 A heat reflector was incorporated below the burner head.
 The componant parts
 Pan support x 2
 Base
 Burner, reflector and stand pipe assembly.


 Gas tube and regulator assembled.
 Pan supports in situ.
Complete assembly weight 139 grams.


Top Left:  here is the stove, windsheild and pan. Together with my breakfast bowl,mug and lid.
Top right: The windsheild rolls up into my mug.
Bottom left: The mug fits into my insulated bowl.
Bottom Right: The bowl/mug lid keeps everything safe and secure. There is still room in the mug for 2 breakfast cereals to be stored.
The stove itself fits easily into the 600ml Ti pan. With lots of storage space left for other gear.


Find it Here

About Me

My other blog. beneathwhosefeet.wordpress.com