Carrying any sort of DSLR or 4/3rds camera or compact for that matter when hiking can be a bit of a pain. I have never been very comfortable with the options available. There are many different types of camera support systems on the market but none had taken my fancy. They were basically designed for street photographers and I say that respectfully, rather than backpackers on long trips where you don't want to keep stopping to de-bag the camera whether it be in a separate camera case or worse still in the rucksack.
That was until I was watching a YouTube video during the first covid lockdown period and the American backpacker was using this clip system. I couldn't catch the name of the clip from the video but after some googling I managed to find out who the manufacturer was.
It was Peak Designs.
It turns out that this kit was originally a Kickstart item in 2011. It raised $15 million. Since then there have been 3 versions. The clip that I purchased and which this review is based on is the V3 which was released in 2018.
I won't bore readers with the history of the previous 2 versions because it's all available on line for those who want to know. What I will say though is that the V3 is the smallest and lightest version without distracting from the carrying specifications.
The clip weighs 84 grams and includes the locking plate that attaches to the camera base.
Beautifully smooth CNC machined and anodised aluminium, weatherproof and finished in black as mine is or silver option.
Image from Peak Design website.
The clip has an impressive carry weight of 90kg plus. or 200lb in old money. Far more than any camera.
Item 1, fits to your rucksack strap or it can also be tailored to fit on trouser belts or other types of bags. A separate strap for this method is available as an add an accessory. I didn't purchase this addition as I will probably only use it on my rucksack strap.
The dimensions are, width 8.3cm, height 4cm, depth 2cm.
Item 2, this fits onto the base of the camera using the tripod location. The thread is 1/4 -20 UNC. Standard on all cameras. It is a 4 way fitting into the clip so it doesn't matter which way round you locate it to the camera base. You fit it in a way which best suits the lenses you want to attach. You can't get it wrong. Honest.
Item 3, 2 sets of screw are provided, one pair which are finger tightening and the other pair hex head tightening.
Item 4, Hex key for tightening the plate to camera and the optional use screws. Complete with ring attachment to a key fob.
Item 5, Carry case.
In Use.
Fitting the clip to the rucksack strap was a bit of a faff at first and it is MOST IMPORTANT to be aware that the clip is made to fit straps that are no bigger than 6.4cm (2.5") wide and 1.5cm (0.6") thick using the finger tightening screws or a thicker strap, up to 2.2cm (0.88") with the 2 additional set screws.
I refitted the clip three times before I had a comfortable position for the camera on the strap and which was easy to release the locking pin to remove the camera.
By using the 2 set screws my feeling is that by pinching in the straps you could probably get away with straps that are slightly wider than 6.4cm but I haven't proved that yet.
To stop the clip from sliding down the rucksack strap the clip has an injection moulded PVC pad fitted. I haven't had any problems with it sliding down at all. I guess it depends on the total weight of your own set up.
I have seen some videos of the clip in use where users say it was awkward to remove and replace the camera but I found it very easy indeed after 3 or 4 goes. It's all about familiarity and dexterity. If I can do it easily, then anyone can.
Once you slide the camera into the clip you hear a click which is the locking pin latching securely. If the camera is to be in the clip for a period of time or you are going through difficult terrain like forestry etc etc where you may have to bend or climb over obstacles then by turning the locking pin 90 degrees this stops the pin from being inadvertently released. When safe, turning the pin 90 degrees again releases it.
If you look at the clip and pin you will see a pair of lines, one on the body and the other on the pin head. When aligned the pin is free to unlock.
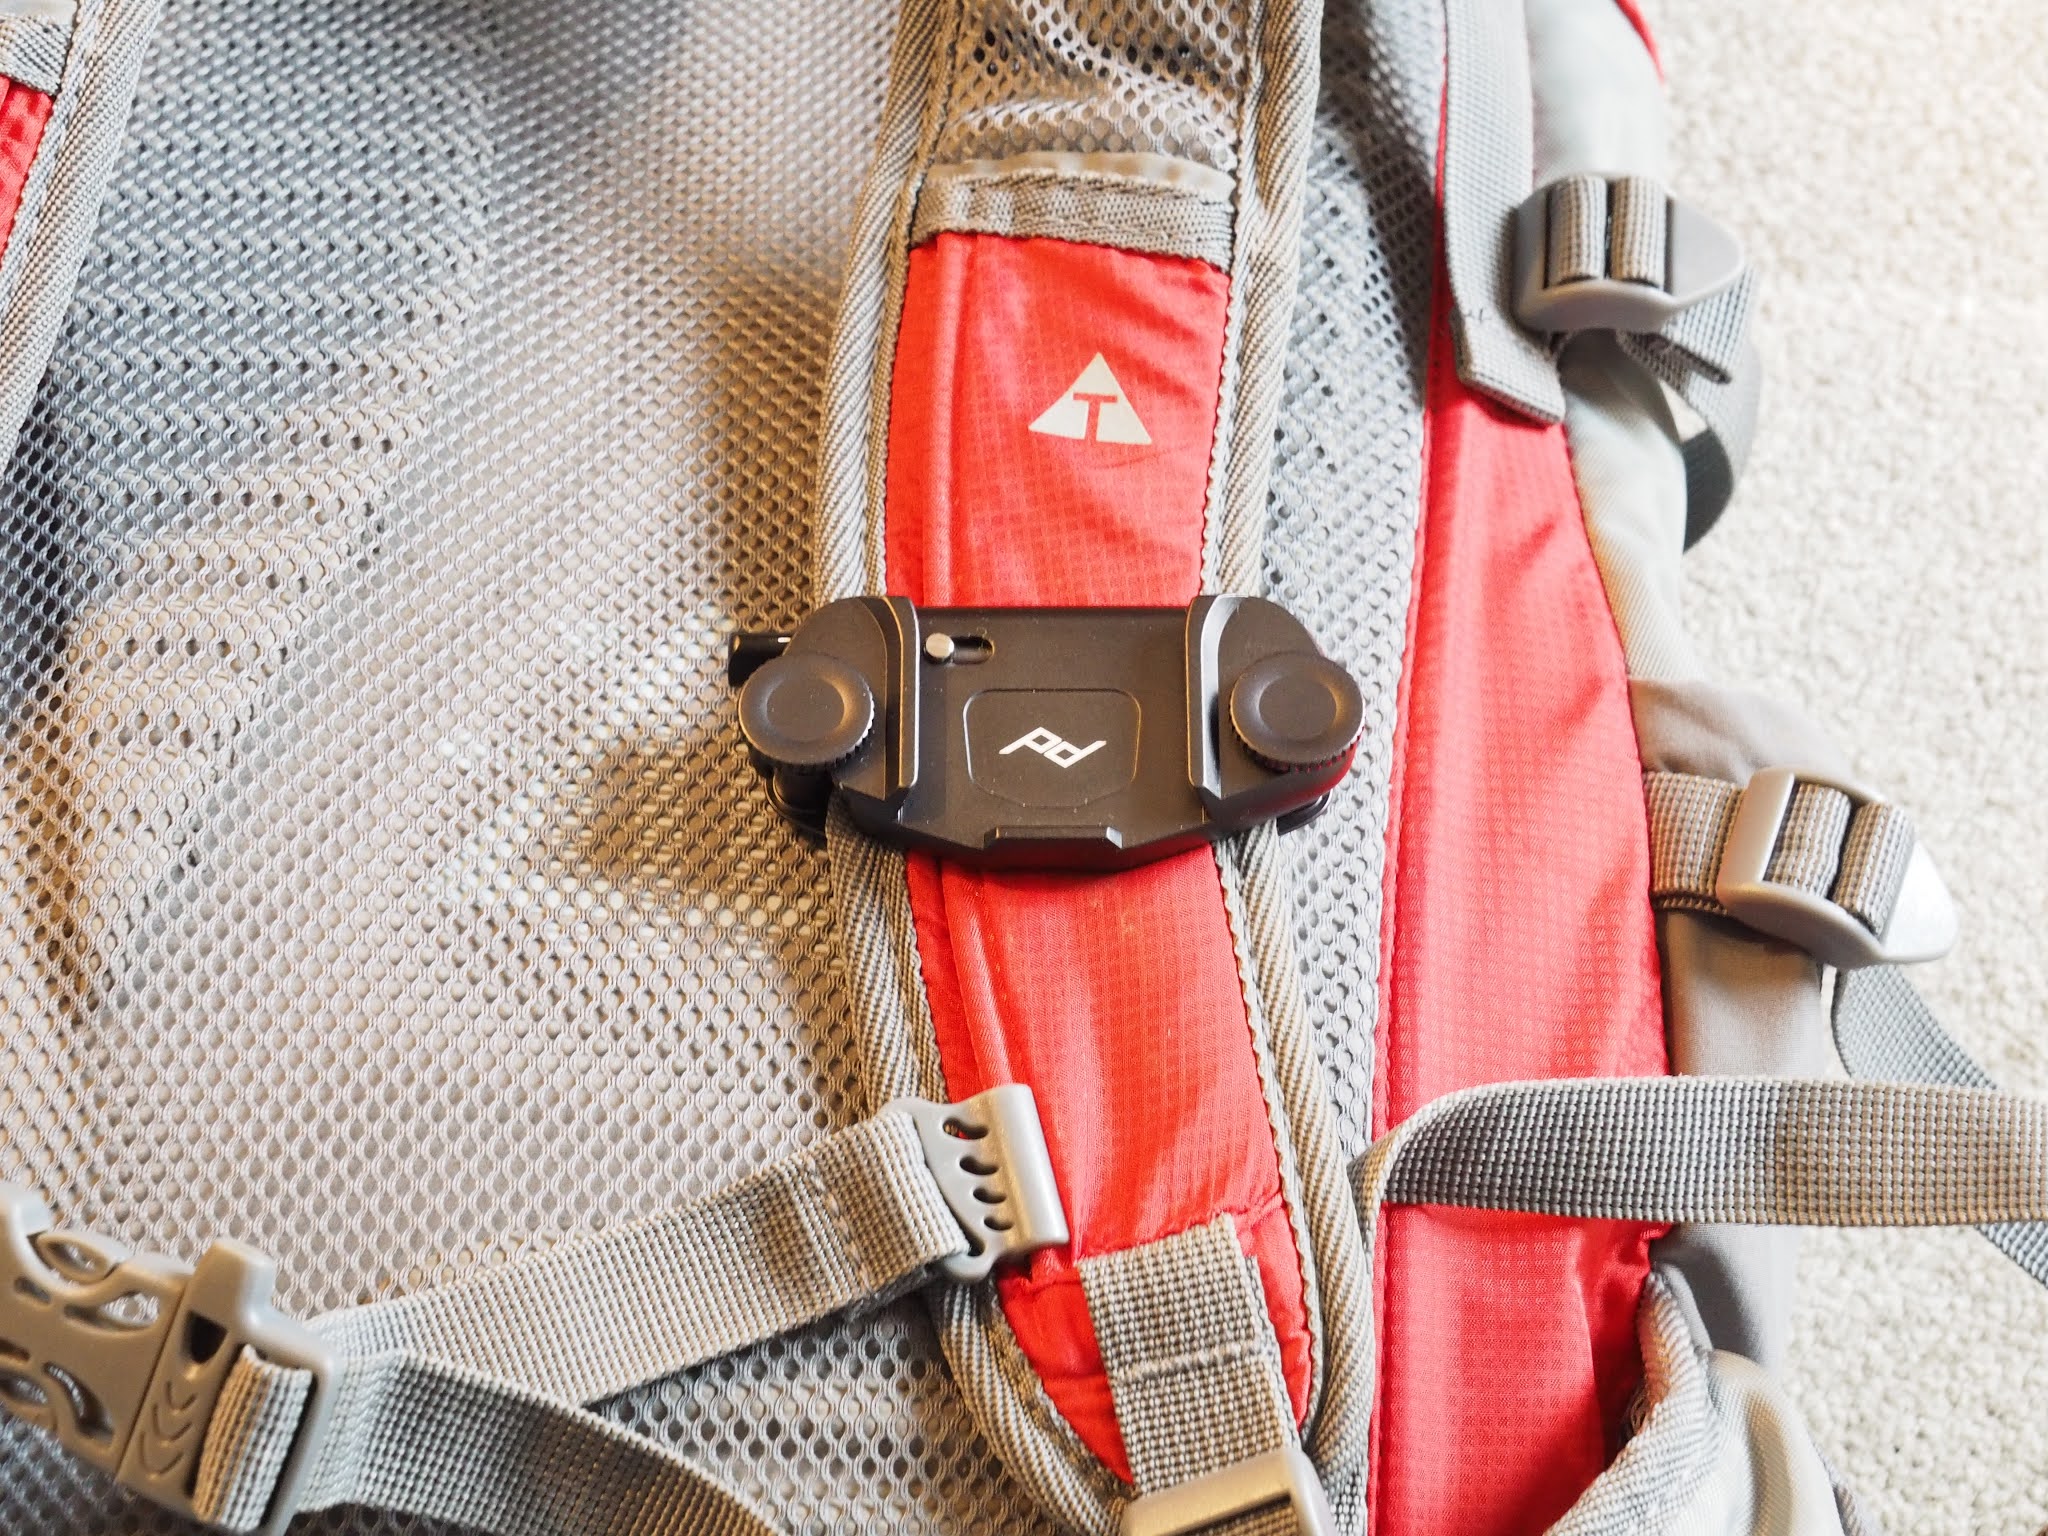
Peak Designs Capture clip in situ.
Locking pin in unlocked position
Peak Designs recommend that you fit the clip on the right hand strap but from what I found I prefer it on the left strap. It makes no difference to its operation, it is what ever suits you best. It is trial and error and personal preference.
It will come as no surprise that with an expensive camera and lens set up that I was quite nervous about it falling out and causing damage when I first used it. I can put your mind at ease, that feeling soon disappears as you get used to locking and unlocking it. It is a solid assembly and I never have any reservations about using it now.
The plate which screws to the camera is Arca type and therefore doesn't fit that many tripods. Quite a lot of tripods with slide in guides use RC2, for example the Manfoto tripods. (See Footnote)
Peak Designs do provide a solution with the dual plate accessory which currently costs £19.
What I liked.
- Overall weight of the assembly and the weight it can support.
- Small size
- Locking mechanism
- Numerous accessories for lenses and Go Pro's etc.
- Feel of security
- Beautifully engineered design
- Weatherproof.
What I didn't like.
- The plate attached to the camera could cover some camera battery box covers. Its ok on my Nikon and Olympus.
- Need to carry the Allen key with you. A coin screw lock would be better. The Allen key can be attached to your key fob.
- Doesn't fit to all tripods.
- The restriction on rucksack strap width.
Summary.
I haven't mentioned the cost as a like or dislike because it depends on everyones personal perspective. It costs £52. I believe it is a price worth paying because cameras are expensive pieces of kit and I wasn't prepared to pay for something cheap that may or may not work. I wasn't prepared to take the risk.
It is well made, will last and very little if anything to go wrong. It is very comfortable and after only 10 or 15 minutes you forget you have it with you.
I wouldn't be without it. It's a fantastic piece of kit.
Footnote. Since publishing this post I have played around with my Manfoto travel tripod and found that if you leave off the quick release plate and just use the Peak Design clip plate attached to the camera base. It is functional and will attach to the tripod adjustable vice. There are no override stops as with the Manfoto quick release plate but its a small price to pay considering that you don't need to buy the dual plate or have the hassle of changing attachment plates.
Disclaimer. I bought this item with my own money. I wasn't asked to do a review and have no affiliation with Peak Designs.
Added 6th March 2021.
The comment below raised by Alun is a fair point and one which I did look into before publishing this post, and why I still think the clip is good.
The base design on the tripod mounts which have broken on some models of Olympus cameras are a different design to my Olympus OMD-EM5 MK2 but not the MK3. Maybe Olympus changed it because it was a failure point. That is my assumption and not fact.
Below is the broken base and then an image of my EM5.
Tripod Mount which shows breakage.
The tripod mount on EM5 MK2 which is completely different.


I believe that was one of the mounts I considered a few years back, either version 1 or 2, when I carried a DSLR. It looked well engineered and very neat and small for its load capacity, but I didn't want the weight pulling down on the shoulder strap.
ReplyDeleteMuch as I loved that Canon DSLR with 'L' lens, eventually I gave up and succumbed to a modern compact (Sony RX100) that would fit in my hipbelt pocket.
Hi Geoff, the wheel goes round as they say. I too had a DSLR, then a 4/3rd when they first came out. Then numerous compacts. Now I have a Nikon 1 J5 which is a wonderful hiking camera and a 4/3rds Olympus OMD em5 which I love and is what I use daily. It’s plastic bodied with a good lens and is fully waterproof. Neither camera puts so much strain on the strap as to be a problem but I can imagine lots of DSLRs would if you were hiking.
ReplyDeleteThe Sony RX100 is a very good camera. As you images show.
Hi Alan
ReplyDeleteGreat review, something for me to consider...useful to hear from someone with first hand experience.
Thanks again
Alistair
Thanks Alistair, much appreciated.
ReplyDeleteHi Alan
ReplyDeleteAs you use a plastic bodied E-M 5 presumably a Mark 3, I thought that I would make you aware of the following discussion. https://www.dpreview.com/forums/post/63815284
How many people have suffered from this problem and what lenses they had attached I don't know, but it has put me off using a PD clip on my E-M 10.
Cheers
Alun
Hi Alun, thanks for your comment. I was aware of this failure point and I asked Olympus what they thought. I didn’t get a reply. However I searched forums and other sites to see if I could get an idea of the size of failure but I couldn’t get any failure data. I decided to go ahead and use it hoping that the failure rate was small. Also we don’t really know how the failure happened or what the real circumstances were. It is an expensive failure and one I am not taking lightly obviously. My Olympus is the MK 2 btw. I only have 2 lenses the 14-150 and the 45mm.
Delete