
Sent from my HTC
Friday, March 18, 2011


Tuesday, March 15, 2011
TarpTent Moment first pitch.
This post is my first look at the TarpTent Moment. It’s not a review as i havn’t taken it beyond the garden yet.
The Moment is a one man, single entrance, single skin tarp tent. There is a central single loop pole and also at each end there are 2 carbon fibre rods permanently fixed into sleeves in an A shape.
An option for the buyer is a separate crossing pole for use in high winds or snow conditions, which is shown fitted in the photo below. For UK users i would say it is a necessity.
There is a breathable inner roof liner and a Tyvek footprint. I chose all these options. There was no Moment footprint at the time i ordered so i chose the Rainbow model and will modify it.
There is one available now for the Moment.
Weight 0.85kg and cost is US$215. $30 for the liner, $12 for the footprint and $15 for the 2nd pole set. Plus the cost of postage, import duty and handling by Parcel force.
Pitching.
 Once the pole has been located into the yellow sleeve, take one of only 2 pegs required with this tent. Pull out the lines on one end and locate the peg. No need to do any adjustments yet.
Repeat the operation at the other end, putting some tension on the material and positioning the central pole as required. (Don’t look to closely at the tensioning on the photo as no adjustments had been made at this time)
 Once the tent is upright then it’s a simple matter to set the positions of the carbon fibre rods and by tensioning the lines the fabric is tensioned.
I didn’t time the set up operation but it must have been between 1 and 2 minutes to have a standing tent. It is without doubt the fastest tent i have ever pitched.
Adjustment and venting.
At the base of the centre pole, there are fabric pull tensioners at each end. These can be adjusted to raise or lower the outer material to increase/decrease venting as required.

The triangular shaped fabric at both ends of the tent are semi removable. They can be rolled back and secured. This reveals a mesh allowing through venting.

In the roof there are also 2 vents.

 The tent has a floating bathtub groundsheet. Attached all the way round between the groundsheet and the side walls is a venting mesh. It also acts as a midge or bug barrier.
 The inner doorway is completely mesh.
The design seems to have the words "Prevent Condensation” shouting at you. However condensation is one thing i don’t believe can be overcome altogether. The conditions have to be just perfect to stop it forming and that’s very rare in my book.
So that’s why i bought the inner liner, incase there is any condensation run off or drips etc it will be caught by the liner and exits through the floor/wall mesh and hopefully not on the sleeping bag.
The liner locates on 4 clips centrally and 3 elasticated clips at either end. The liner can be left in place permanently.


Inner dimensions.
Floor is 213cm long x 107cm wide. The internal height is 99cm. I put a 180cm x 60cm x 3mm insulating mat inside and there is plenty of room.
 At this point i got into the tent and lay down assessing head room, turning over, kneeling and sitting up and for me at 5Ft 8 inches it is plenty big enough.

 Inside the tent there is plenty of space for gear on the opposite side to the door and also the porch itself is big enough for a large rucksack, cooking gear and boots.
 At both ends are located 2 compartment mesh pockets of useable size. (Unlike the Scarp 2 pockets which are useless). I would expect that these pockets will be put into the Scarp 2 and standardise on parts.
When i came to remove the 3mm pad i got the biggest whack of static electricity i have ever had. Obviously the Sil Nylon groundsheet and the foam insulation material (which by the way is from B&Q and is made to insulate laminate floors) do not like each other. But this matting is too good to throw out so i will try it next time underneath the groundsheet.
Well i hope this little tester proves helpful to others and i will do a more detailed review when i take it on the hill, soon.
The Moment is a one man, single entrance, single skin tarp tent. There is a central single loop pole and also at each end there are 2 carbon fibre rods permanently fixed into sleeves in an A shape.
An option for the buyer is a separate crossing pole for use in high winds or snow conditions, which is shown fitted in the photo below. For UK users i would say it is a necessity.
There is a breathable inner roof liner and a Tyvek footprint. I chose all these options. There was no Moment footprint at the time i ordered so i chose the Rainbow model and will modify it.
There is one available now for the Moment.
Weight 0.85kg and cost is US$215. $30 for the liner, $12 for the footprint and $15 for the 2nd pole set. Plus the cost of postage, import duty and handling by Parcel force.
Pitching.

Repeat the operation at the other end, putting some tension on the material and positioning the central pole as required. (Don’t look to closely at the tensioning on the photo as no adjustments had been made at this time)

I didn’t time the set up operation but it must have been between 1 and 2 minutes to have a standing tent. It is without doubt the fastest tent i have ever pitched.
Adjustment and venting.
At the base of the centre pole, there are fabric pull tensioners at each end. These can be adjusted to raise or lower the outer material to increase/decrease venting as required.

The triangular shaped fabric at both ends of the tent are semi removable. They can be rolled back and secured. This reveals a mesh allowing through venting.

In the roof there are also 2 vents.


The design seems to have the words "Prevent Condensation” shouting at you. However condensation is one thing i don’t believe can be overcome altogether. The conditions have to be just perfect to stop it forming and that’s very rare in my book.
So that’s why i bought the inner liner, incase there is any condensation run off or drips etc it will be caught by the liner and exits through the floor/wall mesh and hopefully not on the sleeping bag.
The liner locates on 4 clips centrally and 3 elasticated clips at either end. The liner can be left in place permanently.


Inner dimensions.
Floor is 213cm long x 107cm wide. The internal height is 99cm. I put a 180cm x 60cm x 3mm insulating mat inside and there is plenty of room.


When i came to remove the 3mm pad i got the biggest whack of static electricity i have ever had. Obviously the Sil Nylon groundsheet and the foam insulation material (which by the way is from B&Q and is made to insulate laminate floors) do not like each other. But this matting is too good to throw out so i will try it next time underneath the groundsheet.
Well i hope this little tester proves helpful to others and i will do a more detailed review when i take it on the hill, soon.
Saturday, March 12, 2011
Tarptent Moment
After many weeks of Spec checking, price checking and reading as much as possible on one man tents i am now in possession of the Henry Shire's Moment. I had been hoping that some company would do an eVent tent or a similar type of material but it doesn't look like it's going to happen unfortunately. Why manufacturers are not doing more in this direction i don't know. TN have gone some ways towards it with the Gemini using GORE-TEX® FLO2 fabric, but i couldn't wait any longer for a solo version.
I have not had time to do a first impressions as yet and as you can imagine i can't wait to try it out.
 This photo is from the new Tarptent website which is brilliant by the way. (Hope Henry doesn't mind me using the pic.)
I didn't have an arm and a leg to spend on a one man tent, like the Terra Nova Laser Ultra 1 at £650!
So the price of $215 for the Moment was very competitve. And at the top of the priority list was the weight. I didn't want to go over 1kg and this lot weighs 0.85kg.
I had a good conversation with Martin Banfield recently, who's very readable blog is here about the TN Laser Ultra and he has some very good views about it's positioning in the market place. Maybe more on that in a later post.
Henry tested this tent out on last years TGO challenge and by all accounts it handled everything very well.
I purchased the breathable inner liner also, which will reduce any condensation problems. But when you see all the venting on this tent the issue shouldn't be major anyway.
I also decided to buy the footprint off the Taptent Rainbow and modify it to suit the Moment as at this time there isn't a specific Moment footprint.
I would also like to thank Maz who's fine blog The Journeyman traveller is here. He kindly offered to lend me the Fly Creek UL tent to appraise before i decided. However due to circumstances i didn't get a backpacking window in February so i never took the offer up. But what a kind offer.
So i need to seam seal it now and then get out there and review it.
More to come later.
I have not had time to do a first impressions as yet and as you can imagine i can't wait to try it out.

I didn't have an arm and a leg to spend on a one man tent, like the Terra Nova Laser Ultra 1 at £650!
So the price of $215 for the Moment was very competitve. And at the top of the priority list was the weight. I didn't want to go over 1kg and this lot weighs 0.85kg.
I had a good conversation with Martin Banfield recently, who's very readable blog is here about the TN Laser Ultra and he has some very good views about it's positioning in the market place. Maybe more on that in a later post.
Henry tested this tent out on last years TGO challenge and by all accounts it handled everything very well.
I purchased the breathable inner liner also, which will reduce any condensation problems. But when you see all the venting on this tent the issue shouldn't be major anyway.
I also decided to buy the footprint off the Taptent Rainbow and modify it to suit the Moment as at this time there isn't a specific Moment footprint.
I would also like to thank Maz who's fine blog The Journeyman traveller is here. He kindly offered to lend me the Fly Creek UL tent to appraise before i decided. However due to circumstances i didn't get a backpacking window in February so i never took the offer up. But what a kind offer.
So i need to seam seal it now and then get out there and review it.
More to come later.
Tuesday, March 8, 2011
Sunglasses
Over the last few months i have been trying out a pair of sunglasses which should suit all seasons at a very reasonable price.
Being 99.9% UV protection is exactly what is required for outdoor adventures.
There are lots of good glasses out there but some are hellishly expensive and once you start to get into snow sports then the price can rocket.

These glasses cope with the glare from snow and bright reflected sun perfectly well.
Made by Peltor with Maxi- impact system for safety and optical clarity. They have triple reflex coating which gives a mirror finish and scratch resistance.
The ones that i have are a red/yellow Titanium colouring to the lenses but they are available with a blue colour if you prefer.
The side bars have a torsion lock which holds them against the head very snuggly. The frames and side bars are high density nylon capable of taking impacts and extreme temperatures.

At the bridge of the nose and at the temples are vents to assist in the de-misting process. They also work well in keeping the rain out of the eyes on bad weather days. The colour of the lenses keep the vision light rather than dark as they would be with std black lens glasses.

All in all they are suitable for the following sports:- Hiking, Fishing, Driving, Sailing, Yachting, Skiing, Snowboarding, Surfing, Tennis, Cricket, Running, Athletics
CE Approved to EN 166 1FT & EN 172 (99.9% UV Protection).
Cost. £12.99 which i think is a great price for such a quality item.
Available at Amazon, from a company called Hand Held Audio. Click Here.
Being 99.9% UV protection is exactly what is required for outdoor adventures.
There are lots of good glasses out there but some are hellishly expensive and once you start to get into snow sports then the price can rocket.

These glasses cope with the glare from snow and bright reflected sun perfectly well.
Made by Peltor with Maxi- impact system for safety and optical clarity. They have triple reflex coating which gives a mirror finish and scratch resistance.
The ones that i have are a red/yellow Titanium colouring to the lenses but they are available with a blue colour if you prefer.
The side bars have a torsion lock which holds them against the head very snuggly. The frames and side bars are high density nylon capable of taking impacts and extreme temperatures.
At the bridge of the nose and at the temples are vents to assist in the de-misting process. They also work well in keeping the rain out of the eyes on bad weather days. The colour of the lenses keep the vision light rather than dark as they would be with std black lens glasses.

All in all they are suitable for the following sports:- Hiking, Fishing, Driving, Sailing, Yachting, Skiing, Snowboarding, Surfing, Tennis, Cricket, Running, Athletics
CE Approved to EN 166 1FT & EN 172 (99.9% UV Protection).
Cost. £12.99 which i think is a great price for such a quality item.
Available at Amazon, from a company called Hand Held Audio. Click Here.
Monday, March 7, 2011
Snowdon and Moel Cynghorion (ps added on 10/3/2011)
We stayed at Caeathro in a lovely large self catering barn this weekend. There were 12 of us and included a seven month old trainee climber.

A number within the group had not done Snowdon and some who had summited in the past, still hadn't seen the view from it.
So it was decided, Snowdon it was to be. At 1,085 metres (3,560 ft). The highest summit in England and Wales.
Our route started at the car park at Tan y Llyn and then along the Rhyd Dhu path, Llechog and along Bwlch Main to the Summit.
The descent was along the Clogwn ridge to the Bwlch Cwm Brwynog where the decision was taken individually whether to carry on up Moel Cynghorion or to carry on down the Snowdon Ranger Path to the car park opposite the YHA.
This route was chosen as it was most likely the quietest route to the top. Snowdon is an increadably busy mountain whatever the weather.

Driving up the valley towards Tan y Llyn we were disappointed to see that Snowdon was in cloud and the day was quite grey and misty.
Not what the forecast said. Did we really believe that! Well, yes we were very hopeful. The day previously was also cloudy but by early afternoon the tops all cleared so we thought this may be the case today.
We set off, as you do, dressed for a cold day and before long you stop and get rid of the fleeces and outer layer. The path up to Llechog is a good one, and rises steadily although steep in a few places.

To the west the undulating trio of Foel Goch, Foel Gron and Moel Eilio were also clear.


We found a place against the wall and out of the bitter wind for a lunch stop.


As we descended we began to walk out of the mist and it revealed the beautiful hidden valley of Cwm Brwynog and it's small glacial Llyn, and also the route of the next ascent to Moel Cynghorion.

Once the Bwlch was reached, 5 decided to carry on up Moel Cynghorion whilst the others opted to continue down the Snowdon Ranger track.

 From the top the view is good across to Llyn Padarn and Llanberis, although today it was a misty one.


It would be made up for later and for those who still havn’t seen the view from the top, another trip will have to be arranged.
Some gear i was trying out today was the Satmap Active 10 GPS, M&S Active undies and a pair of Berghaus Pro Primal Mid Boots.
The Satmap GPS is fantastic kit and it gets 7 (was 10) out of 10.
Comes with mapping for the whole of Britain at 1:50,000 scale and more cards are available at 1:25,000. Very easy to use.
ps (10/3/2011) The unit is driven by a Li-Polymer battery pack or 3 AA Energiser batteries. I both cases when you come to change over one to the other, a cradle has to be removed and a tiny circuit board plug removed. Getting the cradle out is not easy until you have done it a few times but getting the plug out is a real pain as it is tiny and in a poor location to get any grip on it.
They have put this plug on to make the battery pack unique to themselves i am sure. And create a price hike from what you could otherwise buy the battery for. Satmap are charging an incredible £31!
If you have to do this operation in bad weather on a hillside as is a possibility, then you will be cursing Satmap.
When you buy the unit you get a year subscription to there own Route Planner software. I find this software so frustrating. You can lose your route at the click of a mouse so easily. Why they don’t put warnings like other manufactures i am at a loss. Something along the lines of “are you sure you want to delete this” wouldn’t go amiss. These software designers seem to have forgot that not everybody is a wizz kid.
Also when you click a waypoint number or name in the LH column or any other option to be honest. It generates a new track on the map all by itself which you then have to delete. Another nuisance. For these problems i am reducing my 10 score to 7.
The M&S undies get good rather than fantastic and i give them 7 out of 10. I found them very comfy but didn’t wick the sweat away efficiently and therefore became cold as the temperature dropped towards the summit. Although they do shed it as the temperature warms up again.
The Berghaus boots which i have used once before but only on a flat walk proved to be excellent and i give them 8 out of 10. I don’t give 10 because i didn’t like the laces and the cushioning could be better. No complaints as to the weight, grip or comfort.
I havn’t done an in depth review of this kit because there is already plenty on the internet to read about them. But if there are any questions just drop me a comment.

Mark and Owen.
The forecast for Saturday was mainly sun with some cloud.A number within the group had not done Snowdon and some who had summited in the past, still hadn't seen the view from it.
So it was decided, Snowdon it was to be. At 1,085 metres (3,560 ft). The highest summit in England and Wales.
Our route started at the car park at Tan y Llyn and then along the Rhyd Dhu path, Llechog and along Bwlch Main to the Summit.
The descent was along the Clogwn ridge to the Bwlch Cwm Brwynog where the decision was taken individually whether to carry on up Moel Cynghorion or to carry on down the Snowdon Ranger Path to the car park opposite the YHA.
This route was chosen as it was most likely the quietest route to the top. Snowdon is an increadably busy mountain whatever the weather.

Our route. 12.5km and 1,338 metres of ascent.
We were going to leave a car at the Snowdon Ranger car park so that we didn't have to return to the start point.Driving up the valley towards Tan y Llyn we were disappointed to see that Snowdon was in cloud and the day was quite grey and misty.
Not what the forecast said. Did we really believe that! Well, yes we were very hopeful. The day previously was also cloudy but by early afternoon the tops all cleared so we thought this may be the case today.
We set off, as you do, dressed for a cold day and before long you stop and get rid of the fleeces and outer layer. The path up to Llechog is a good one, and rises steadily although steep in a few places.

The Summit of Snowdon in the mist up ahead.
Stopping occasionally to catch ones breath gives the opportunity to look back and across the valley. Llyn Cwellen took on differing colours each minute as the clouds broke or covered it. The magnificent hump of Mynydd Mawr beyond the Llyn and Y Garn to the left, stood out and annoyingly, mist free.To the west the undulating trio of Foel Goch, Foel Gron and Moel Eilio were also clear.
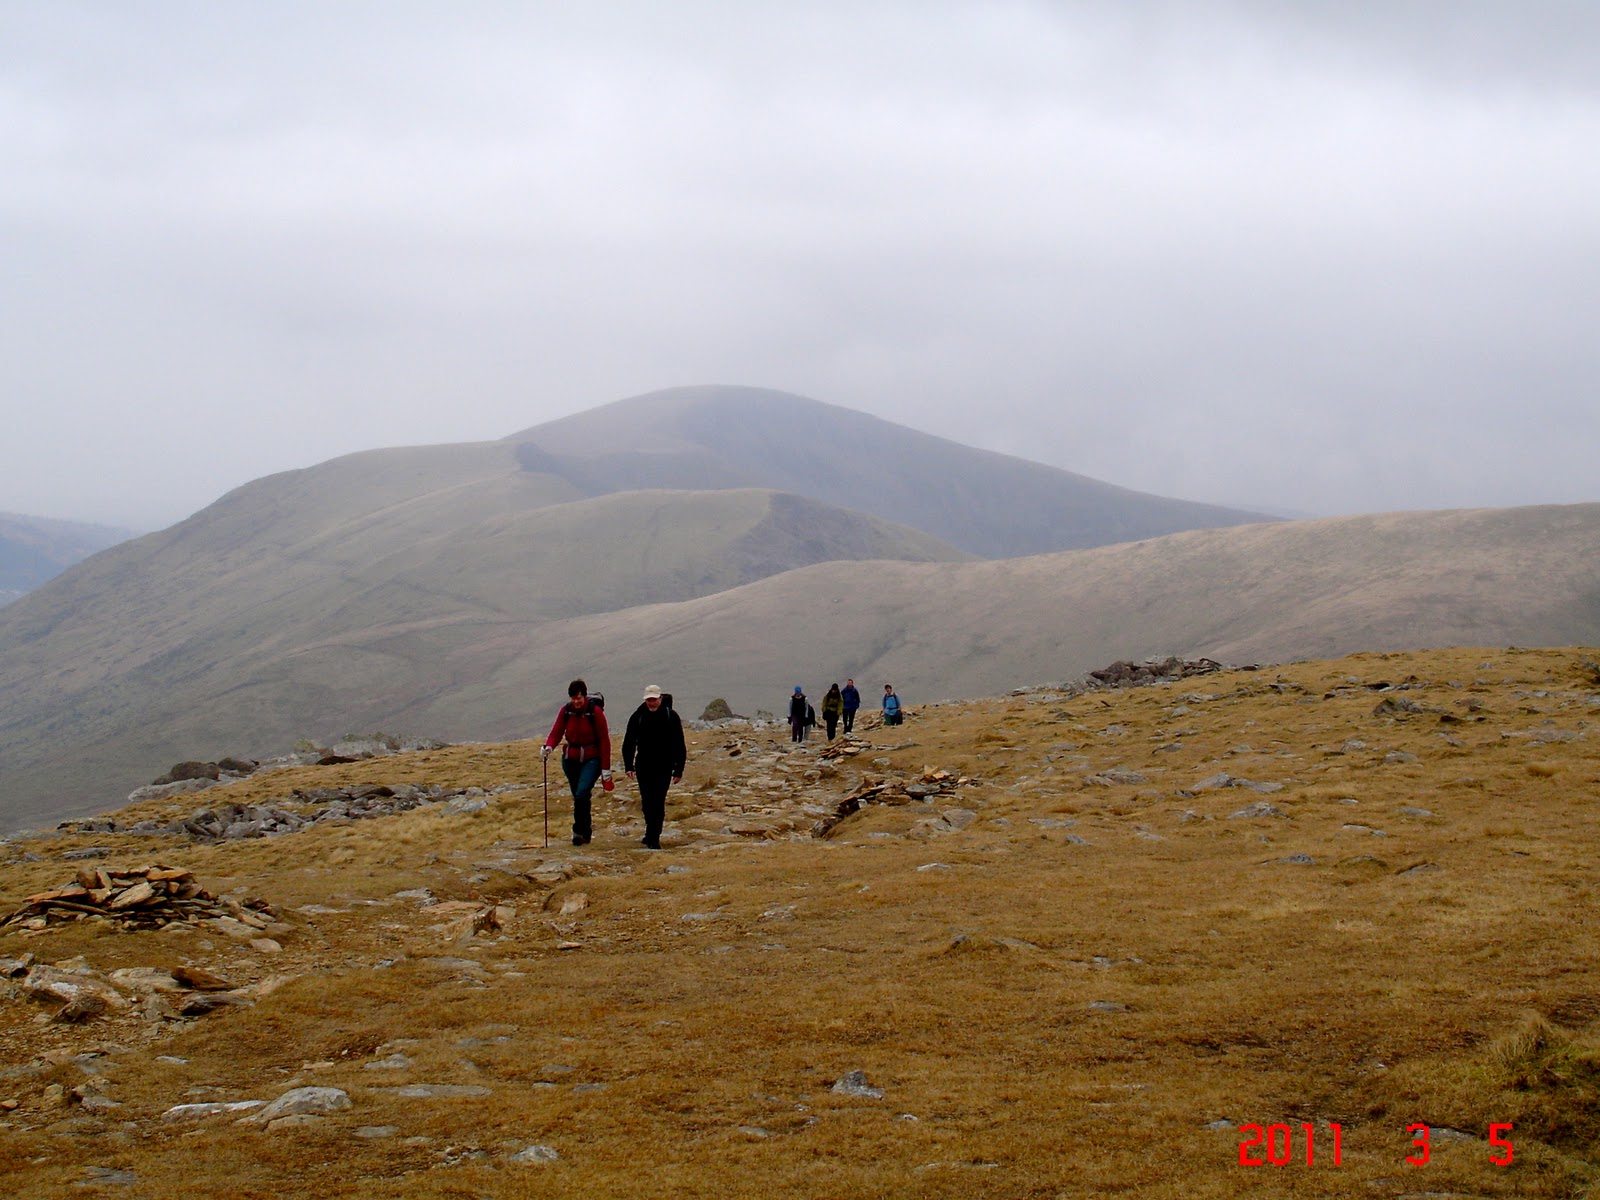
Foel Goch, Foel Gron and Moel Eilio in the background.

Mynydd Mawr beyond the Llyn and Y Garn to the left.
As we made progress, the mist started to swirl round us taking away any views we had. The damp, the wind and the cold resulted in the outer layers being put back on.
Sheila and Richard on a map reading course.

The North facing edge of Llechog with Gillie the 4 legged pace setter.

Llechog and the small Llyn Nadroedd
As we approach Bwlch Main, it was grey and permanently opaque. Walkers coming from the opposite direction gave us the Hikers greeting "Not far to go now" and "It's busy up there”.
On Bwlch Main
Disappointed with the lack of views for all the effort, we arrived at the New Cafe. Not Open! They have made a lovely job of the new building, shame it wasn’t serving.We found a place against the wall and out of the bitter wind for a lunch stop.

The summit cafe wall
The summit was certainly busy and that's without the trains running from Llanberis. We stayed at the top only long enough to eat lunch and take the pictures which remind us of being at the summit on this day.

Snowdon Summit
Following the rail track NNW we made progress downward avoiding as best as possible the hordes on there way up from Llanberis and the runners, mountain bikers, mobility scooters, stilt walkers, jugglers etc. Making sure that we didn't miss the turn off left down the Clogwyn ridge.As we descended we began to walk out of the mist and it revealed the beautiful hidden valley of Cwm Brwynog and it's small glacial Llyn, and also the route of the next ascent to Moel Cynghorion.

On the way down Clogwyn.
On our way down the quite badly eroded section, 2 mountain bikers came haring past us. Unfortunately the track is deeply scarred and in one section was a group of 5 walkers who were unaware of the fast approaching bikers. The bikers were in the deep ruts and the walkers couldn’t get out fast enough. The side walls being about 3-4 ft high. Four of them managed to avoid the bikes but one girl was stuck on a sharp bend, she couldn’t do anything but close her eyes. The bike missed her by the smallest margin, inches only. It was so close to a bad accident. Bikes are allowed on this track, so no problems there but a bit of common sense wouldn’t go amiss from the riders or some warning device would be better.Once the Bwlch was reached, 5 decided to carry on up Moel Cynghorion whilst the others opted to continue down the Snowdon Ranger track.

Moel Cynghorion
The visibility was good and we could see the top. The track is steep but seemed even steeper now that the legs were tiring. Once the top is attained, it is a nice easy walk WSW and then South to rejoin the Steep Snowdon Ranger track and back to the car.

The view onward

The view back

Sun rays on Y Garn

Just before hitting the road we came upon these gravel eating sheep. Strange.
Back at the car park we were surprised to find it empty and it's such a shame the YHA wasn't a pub. I could have just gone a nice pint. It would be made up for later and for those who still havn’t seen the view from the top, another trip will have to be arranged.
Pete’s Eats here we come! Get the chip pan on.
Some more photo’s can be seen here.
Some gear i was trying out today was the Satmap Active 10 GPS, M&S Active undies and a pair of Berghaus Pro Primal Mid Boots.
The Satmap GPS is fantastic kit and it gets 7 (was 10) out of 10.
Comes with mapping for the whole of Britain at 1:50,000 scale and more cards are available at 1:25,000. Very easy to use.
ps (10/3/2011) The unit is driven by a Li-Polymer battery pack or 3 AA Energiser batteries. I both cases when you come to change over one to the other, a cradle has to be removed and a tiny circuit board plug removed. Getting the cradle out is not easy until you have done it a few times but getting the plug out is a real pain as it is tiny and in a poor location to get any grip on it.
They have put this plug on to make the battery pack unique to themselves i am sure. And create a price hike from what you could otherwise buy the battery for. Satmap are charging an incredible £31!
If you have to do this operation in bad weather on a hillside as is a possibility, then you will be cursing Satmap.
When you buy the unit you get a year subscription to there own Route Planner software. I find this software so frustrating. You can lose your route at the click of a mouse so easily. Why they don’t put warnings like other manufactures i am at a loss. Something along the lines of “are you sure you want to delete this” wouldn’t go amiss. These software designers seem to have forgot that not everybody is a wizz kid.
Also when you click a waypoint number or name in the LH column or any other option to be honest. It generates a new track on the map all by itself which you then have to delete. Another nuisance. For these problems i am reducing my 10 score to 7.
The M&S undies get good rather than fantastic and i give them 7 out of 10. I found them very comfy but didn’t wick the sweat away efficiently and therefore became cold as the temperature dropped towards the summit. Although they do shed it as the temperature warms up again.
The Berghaus boots which i have used once before but only on a flat walk proved to be excellent and i give them 8 out of 10. I don’t give 10 because i didn’t like the laces and the cushioning could be better. No complaints as to the weight, grip or comfort.
I havn’t done an in depth review of this kit because there is already plenty on the internet to read about them. But if there are any questions just drop me a comment.
Tuesday, March 1, 2011
Gosforth St Mary’s Church
Sheila’s mum lives quite close to St Mary’s Church in Gosforth, West Cumbria and we have been going to the village for quite some time. We pass the church on numerous occasions but have never been in, even though we know there is plenty of interest within.
So this weekend we decided to go and have a look.

The “potting” Shed is now a listed building as it was built with the original old bricks.


The church consists of a nave with north aisle, chancel, and a pasir of north vestries. Norman stonework can be found in the south wall of the nave. There is no tower, but a very nice bell turret at the west gable houses a ring of three bells.

The real treasure of Gosforth, however, stands in the churchyard. This is the so-called Gosforth Cross, a beautifully carved Viking cross dating from the late 10th or early 11th century. The cross is made of red sandstone, and stands 14 feet high. It is round at the base, rising to a square top with a cross head.


The lower, rounded section is carved with a representation of the Ash, known to the Vikings as the Tree of Life, with interlaced branches creating a wonderfully Scandanavian pattern. The square upper section has a wealth of carving detail, including images of a horseman, dragons, serpents, human figures, and geometric design. Only the east face has anything vaguely Christian; here you will find a carving of Christ standing above figures thought to be Mary Magdalene and Longinus. The cross has traditionally been interpreted as representing the triumph of Christianity over the old Norse pagan religion, but when you look at the carving you have to wonder just how complete that victory was at the time it was carved!
The carving is truly amazing, and the Gosforth Cross must be reckoned one of the finest pre-Conquest treasures in England, right up there with the Bewcastle Cross near Carlisle. Its actually a bit of a shame that it is still standing out in the British weather, mind you, where it will undoubtedly continue to suffer the effects of advancing years.
But, there's more to see within the church. At the east end of the north aisle are a pair of beautifully carved hogback tombstones, discovered during repairs to the church foundations in 1896. These were meant to act as houses of the dead, and mark the graves of local Norse chiefs. They are carved with lovely geometric patterns and battle scenes.


The capitals of the chancel arch are Norman work. The south capital is carved with three faces, and the north capital shows a Green Man symbol on one side, and two detached arms. There are further ancient fragments of stonework including a section of a carved cross.
 There is a Chinese iron bell on the western window sill along with a pair of cannon balls.
 The bell was cast in 1839 and captured in 1841 by Sir Humphrey Le Fleming Senhouse from the Anninghoy Fort at the mouth of the Pearl River, Maccao.
When the bell came to Gosforth a local blacksmith made a clapper for it and it was then hung in the bell tower. However Chinese bells are meant to be struck from the outside so at the first ringing with the clapper, the bell cracked and was taken down a little later during some restoration work.
The cannon balls came from the Dardanelles during the Crimean war.


In the Church yard stands an old Cork Tree which was planted in 1833. This is said to be the most northerly living Cork Tree.

 Many of the headstones are huge and ornately carved. This one below shows the Grand United Order of Oddfellows. The date shows 1874.


Although St Mary's may be a Victorian church, the history and artefacts that date back from the 10th century are certainly worth a visit if you are ever in the area.
(some information was gathered from Express Britian)
So this weekend we decided to go and have a look.

St Mary’s Gosforth Cumbria
There has been some form of religious building at Gosforth since the 8th century. The current church of St Mary is a Victorian building incorporating pieces from a 12th century Norman church.
The “potting” Shed is now a listed building as it was built with the original old bricks.

The Bell and Clock tower.

The old potting shed
Just inside the entrance porch are some old grave coverings, probably viking.


The church consists of a nave with north aisle, chancel, and a pasir of north vestries. Norman stonework can be found in the south wall of the nave. There is no tower, but a very nice bell turret at the west gable houses a ring of three bells.

The real treasure of Gosforth, however, stands in the churchyard. This is the so-called Gosforth Cross, a beautifully carved Viking cross dating from the late 10th or early 11th century. The cross is made of red sandstone, and stands 14 feet high. It is round at the base, rising to a square top with a cross head.


The lower, rounded section is carved with a representation of the Ash, known to the Vikings as the Tree of Life, with interlaced branches creating a wonderfully Scandanavian pattern. The square upper section has a wealth of carving detail, including images of a horseman, dragons, serpents, human figures, and geometric design. Only the east face has anything vaguely Christian; here you will find a carving of Christ standing above figures thought to be Mary Magdalene and Longinus. The cross has traditionally been interpreted as representing the triumph of Christianity over the old Norse pagan religion, but when you look at the carving you have to wonder just how complete that victory was at the time it was carved!
The carving is truly amazing, and the Gosforth Cross must be reckoned one of the finest pre-Conquest treasures in England, right up there with the Bewcastle Cross near Carlisle. Its actually a bit of a shame that it is still standing out in the British weather, mind you, where it will undoubtedly continue to suffer the effects of advancing years.
But, there's more to see within the church. At the east end of the north aisle are a pair of beautifully carved hogback tombstones, discovered during repairs to the church foundations in 1896. These were meant to act as houses of the dead, and mark the graves of local Norse chiefs. They are carved with lovely geometric patterns and battle scenes.


The capitals of the chancel arch are Norman work. The south capital is carved with three faces, and the north capital shows a Green Man symbol on one side, and two detached arms. There are further ancient fragments of stonework including a section of a carved cross.


When the bell came to Gosforth a local blacksmith made a clapper for it and it was then hung in the bell tower. However Chinese bells are meant to be struck from the outside so at the first ringing with the clapper, the bell cracked and was taken down a little later during some restoration work.
The cannon balls came from the Dardanelles during the Crimean war.


Below, the Norse fishing stone.


There is the beautiful Victorian organ and some stunning stained glass.


And on the wall of the bell tower is a Coat of Arms showing the Lion and Unicorn with the Motto Dieu et Mon Droit. God and my Right.
This is the Motto on the coat of arms of England and the British Monarchy. I am not 100% sure why it is here or the age of it, unless it’s depicting allegiance to the Monarch. (I will find out in due course and make an amendment to the post)


The crocus sunbathing in the church yard


Although St Mary's may be a Victorian church, the history and artefacts that date back from the 10th century are certainly worth a visit if you are ever in the area.
(some information was gathered from Express Britian)
Subscribe to:
Posts (Atom)